First steps with SSTV

Updated 8th of June 2025:
David KZ4TG contacted me, if I concluded any more detailed reverse engineering of the Anytone AT-779UV communication protocol. I did not, so he rolled up his sleeves and did it on his own! The results of his work are published on his KZ4TG Github account
How it started
So I wanted to attend this radio event for children with my oldest son, and the event page said (apart from the obvious fact, that the main part is children making the QSOs on PMR band), that some HAM will also transmit the SSTV images on 2m band of fairy-tale characters (since the event is fairy-tale themed) as a bonus for those participants that are interested in receiving them. I had no experience with SSTV whatsoever, not with receiving and nor transmitting it, so I decided that I want to hijack the event and transmit my images too 😂 But the question was, how to do it?
Research
Image reception
Research how to receive was fairly easy to do, since the event page suggested some software to use for reception of the images. I am copying the list here for the reference in case the original page goes down:
- Robot36 for Android
- SSTV Slow Scan TV for iOS
- QSSTV for Linux
- YONIQ MMSSTV for Windows
- Multiscan 3B for Mac
So apparently, the fastest image reception can be realized by downloading the mobile app, launching it and letting the phone’s microphone listen to the SSTV signal coming out of your radio’s speaker. Same steps goes for reception on the computer. But how about transmitting the images?
Image transmission
I have checked the homepage of MMSSTV app for Windows. Its homepage claims it should be capable of transmitting. But one thing struck me, and that is the fact that the app was not updated for a long time - latest version is from 2010 and I have Windows 11, so I had doubts about compatibility, so I did not download it and searched for something more recent. I have found that there is an alternate version from Spanish developers, that is called YONIQ and I installed it and tried it out.
The software seems pretty intuitive and to transmit images, it can even control your radio’s transmit (PTT) functionality via serial UART interface with the help of piece of software, called Omni Rig .
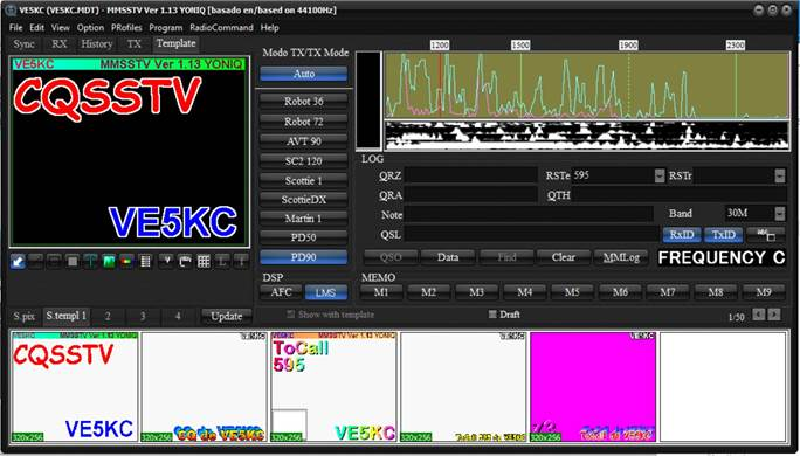
Omni rig
In short, Omni rig is utility that provides means to control your transceiver using serial commands. The Omni rig itself cannot control any radio, but there is a “library” of radio drivers for radios that can be controlled from various developers.
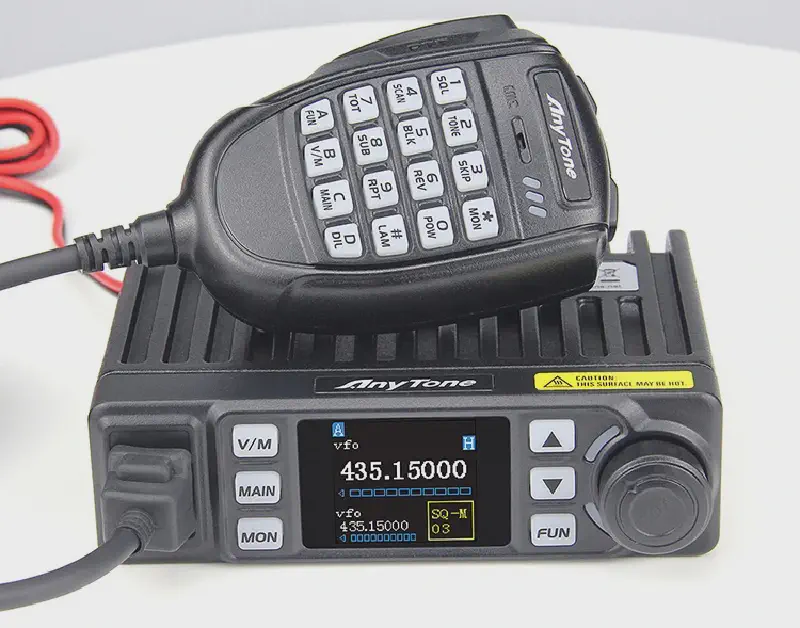
Since I want to test SSTV fun on 2m band, and I own cheap Anytone AT-779UV radio, I was wondering if there is a driver for it. This radio is being programmed using the serial interface that is “hidden” in the microphone connector on the radio’s front panel. Unfortunately, no Omni rig driver for this radio is available. But I really wanted NOT to key the microphone manually by hand for each transmission, so I went investigating how the microphone keying works here.
Microphone reverse engineering
Initially, I thought that PTT functionality will be implemented in analog way, in similar fashion like on all baofengs etc. - that means grounding some pin on the microphone connector. So to test this hypotesis, I went googling for the Anytone AT-779UV microphone connector pinout, but I found only partial information, mainly about have to make programming cable and which pins are serial UART, but not the complete pinout. That meant time for screwdriver and microphone teardown.
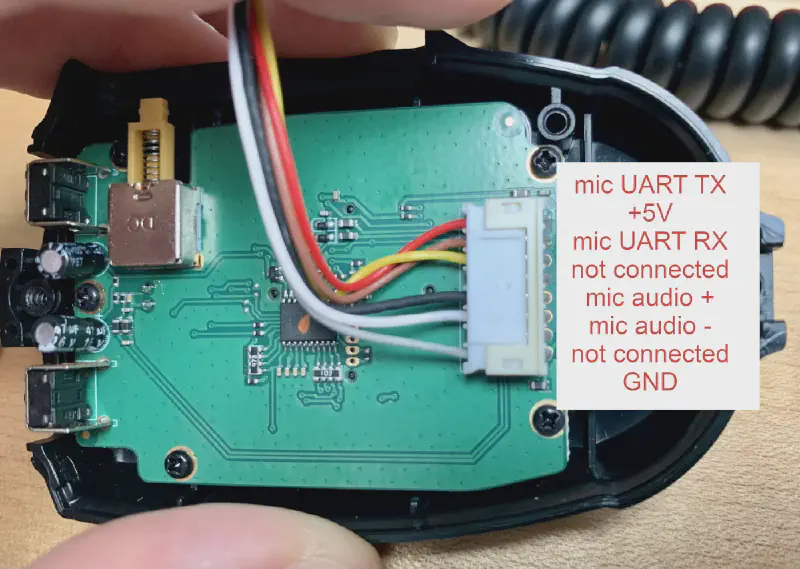
After some tinkering with multimeter and USB-to-serial converter board I have identified the microphone pins. As you can see from the image, there is no dedicated pin for “analog” microphone keying. This means, that it must be keyed somehow via UART serial protocol, which in turn means good news, as it enable to control AT-779UV’s PTT via the Omni Rig (after I also write the driver for it). If it were keyed in “analog” way, the Omni Rig control could not be used.
As you may expect, there is no documentation for the AT-779UV’s serial communication protocol available anywhere. Since I have some brief experience with serial communication protocols from the past, this opened the next chapter of reverse engineering.
Figuring out the serial communication protocol
First thing when reverse engineering the serial communication protocol is that you need to determine the RX/TX pins, error correction mechanism, flow control and the speed, also known as Baud rate. Baud rate can be determined by multiple ways. The best one is to use logic analyzer and associated software that is capable not just determining the speed, but also decoding the protocol. I have no such measurement instrument, so I fell back to the good old oscilloscope. I have measured the duration of one “pulse”, which was around 8μs. Computing the Baud rate is matter of computing 1/0.000008 = 125000. The closest “standard” Baud rate is 115200, so this is how I determined the Baud rate.
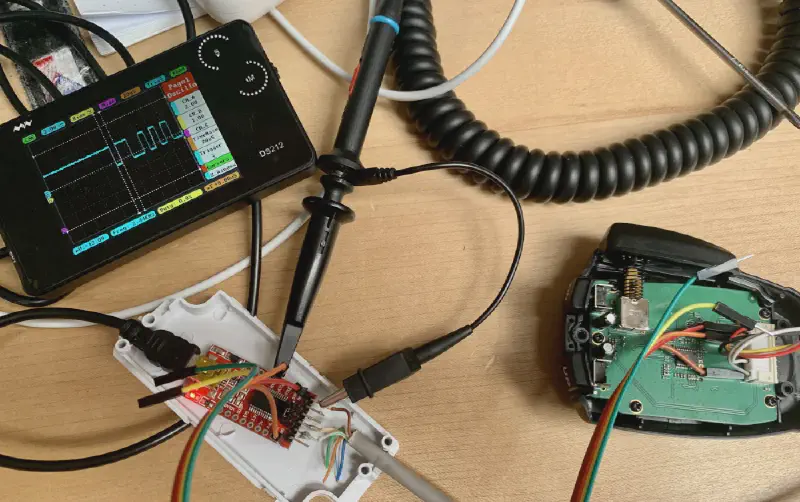
Next was determining the error correction mechanism and flow control. I connected USB-to-serial converter and hooked it to the PC.
After several failed attempts with Wireshark, that was rather complex for this task when you have no prior experience with it,
I tried several other terminal softwares, where some of them worked partially and some di not work at all. More googling
led me towards piece of software called RealTerm
which
claims itself to be used for reverese engineering the serial protocols. After some quick learning how to use the software, I found it
really useful and was able to determine that the AT-779UV’s serial communication protocol parameters are the following:
115200 Baud, 8 bits data frame, 1 stop bit, no flow control.
Now was the time to figure out the communications. After some time experimenting, I found out that to control the microphone keying, you have to send following hexadecimal numbers sequence:
- PTT activate:
0x41 0x01 0x00 0x00 0x00 0x00 0x00 0x06 - PTT deactivate:
0x41 0x00 0x00 0x00 0x00 0x00 0x00 0x06
This is all I need for purposes of sending SSTV images “automatically” using YONIQ software. So I went to Omni Rig documentation to be able to write the driver that will be capable to key the microphone on AT-779UV’s since this is all I need for sending SSTV images. This took about 10 minutes and the driver was born, pretty easy when you know the communication protocol.
The only thing left was to create communication cable, so with help of USB-serial converter board, soldering iron and crimping pliers I have created the data cable, and connected it to the radio. This concludes this article, because I was now able to send the SSTV images with automatic microphone keying happily ever after. Or maybe not.
Houston, we have a problem
Armed with the driver and cable, I launched the YONIQ SSTV software, configured the Omni Rig in the app settings. Then I prepared test image and hit the TX button. The driver and cable worked well and the microphone keying too. But the microphone keying lasted only about 5 seconds and then suddenly the radio de-keyed the microphone for some reason. I tried several times, but the behavior was always the same, the mic keying lasted 5 secs and that was it. Okay, so I went back to the drawing board.
I was wondering why the keying lasts only 5 secs. After some more tinkering and experiments, I have found out that when you key
the microphone that comes with the radio for a long time, it sends periodically 0x06 hex code. This apparently serves as
a heartbeat check and if the radio does not receieve this “hearbeat packet” every 2 seconds or so after you send the PTT activate
data packet, it de-keys the microphone, probably as a protection for case when microphone fails or similar, so the radio does
not stays keyed forever.
I have checked the documentation of the Omni Rig, if there is possibility to send some commands periodically, but unfortunately, there is no such functionality. This meant that I could not use Omni Rig directly this way, but fortunately I had an idea how to solve this mess.
Arduino to the rescue
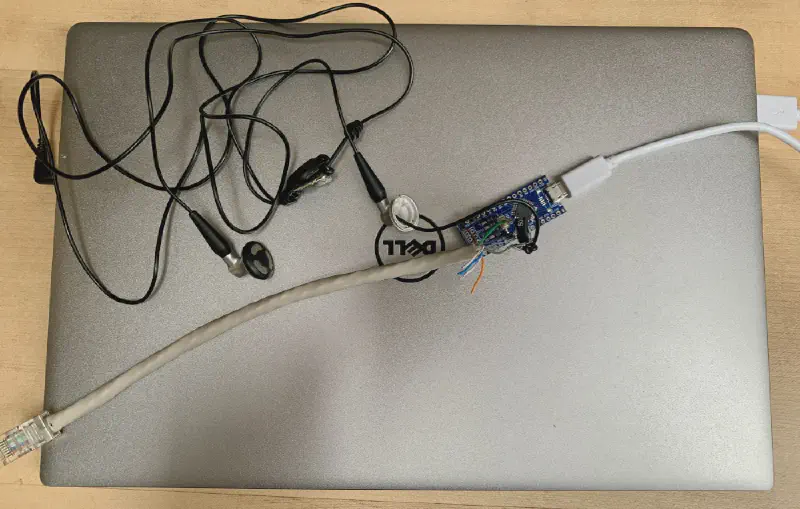
My idea was that I will add Arduino-based middleware between Omni Rig and the radio. Its task would be covering the “heartbeat” functionality. I picked up Arduino nano from my shelf and wrote quick and dirty arduino program, that drives 2 UARTs - one is responsible for “connecting” to Omni Rig and provide commands for PTT on and PTT off, and the other UART in Arduino will communicate with the radio and send data packets it expects and also the heartbeat packets periodically, effectively solving the problem of microphone de-keying. Of course I needed to update the Omni Rig driver to use the new commands designed by me, not the original ones intended for AT-779UV.
The problem with microphone keying is solved. Last piece of puzzle is to send the modulation signal to the radio. Since we already know the mic pinout, this was just matter of connecting the modulation signal from PC to the microphone input. I used old mobile phone headset cable to send modulation signal to the radio. The only thing to keep in mind was that the microphone input is very sensitive, and the line output of the PC is relatively high-power, so I put a potentiometer in signal line to attenuate the signal from PC to acceptable level, not to burn the microphone audio input circuitry in the radio.
Test and conclusion
Now was time to put it into the test. Everything worked as intended, I started transmission and tried to receive on my handheld Quansheng UV-K5 and decode it using iOS app. This is one of the result. WIN!
It was fun project that I pulled off on the saturday afternoon when weather was not very good. I learned something new, which is always nice. 73!